最新stable diffusion3模型服务器本地部署
最新版的stable diffusion3据说不错,就测试了一下,还是比较好安装的,生成效果比之前用的模型好多了。我现在还不太会写prompt,后面再琢磨一下。
这是服务器配置:
| 项 | 说明 |
|---|---|
| 系统 | Ubuntu 20.04.1 |
| 存储 | >100GB |
| Python | 3.10 |
| CUDA Version | 11.8 |
| GPU Driver | 520.61.05 |
| GPU | NVIDIA 3090 1张 |
新建环境
1 | conda create -n SD3 python=3.10 |
下载ComfyUI
1 | git clone https://github.com/comfyanonymous/ComfyUI |
进入SD3的模型链接下载最新的模型sd3_medium.safetensors。(下载模型需要登录账号验证一下。)
浏览器下载容易中断的话,就用迅雷下载。
再进入到text_encoders文件夹,把clip_g.safetensors、clip_l.safetensors、t5xxl_fp16.safetensors三个文件下载下来,这是CLIP模型,用于将文本与图片连接起来的模型(如果显存够,就不要下载t5xxl_fp16.safetensors文件,而是下载t5xxl_fp8_e4m3fn.safetensors文件,这是Int8的量化版本)。
下载完成之后,sd3_medium.safetensors文件放在./models/checkpoints文件夹下,其他3个文件放在./models/clip下。
目前最新的文件夹中多了几个文件:
名称 说明 sd3_medium.safetensors 不包含CLIP模型 sd3_medium_incl_clips.safetensors 也就是 sd3_medium.safetensors + clip_g.safetensors + clip_l.safetensors sd3_medium_incl_clips_t5xxlfp16.safetensors sd3_medium.safetensors + clip_g.safetensors + clip_l.safetensors + t5xxl_fp16.safetensors sd3_medium_incl_clips_t5xxlfp8.safetensors sd3_medium.safetensors + clip_g.safetensors + clip_l.safetensors + t5xxl_fp8_e4m3fn.safetensors 也就是说你下载了下面那些模型文件一些CLIP的文件就不用再下载了。
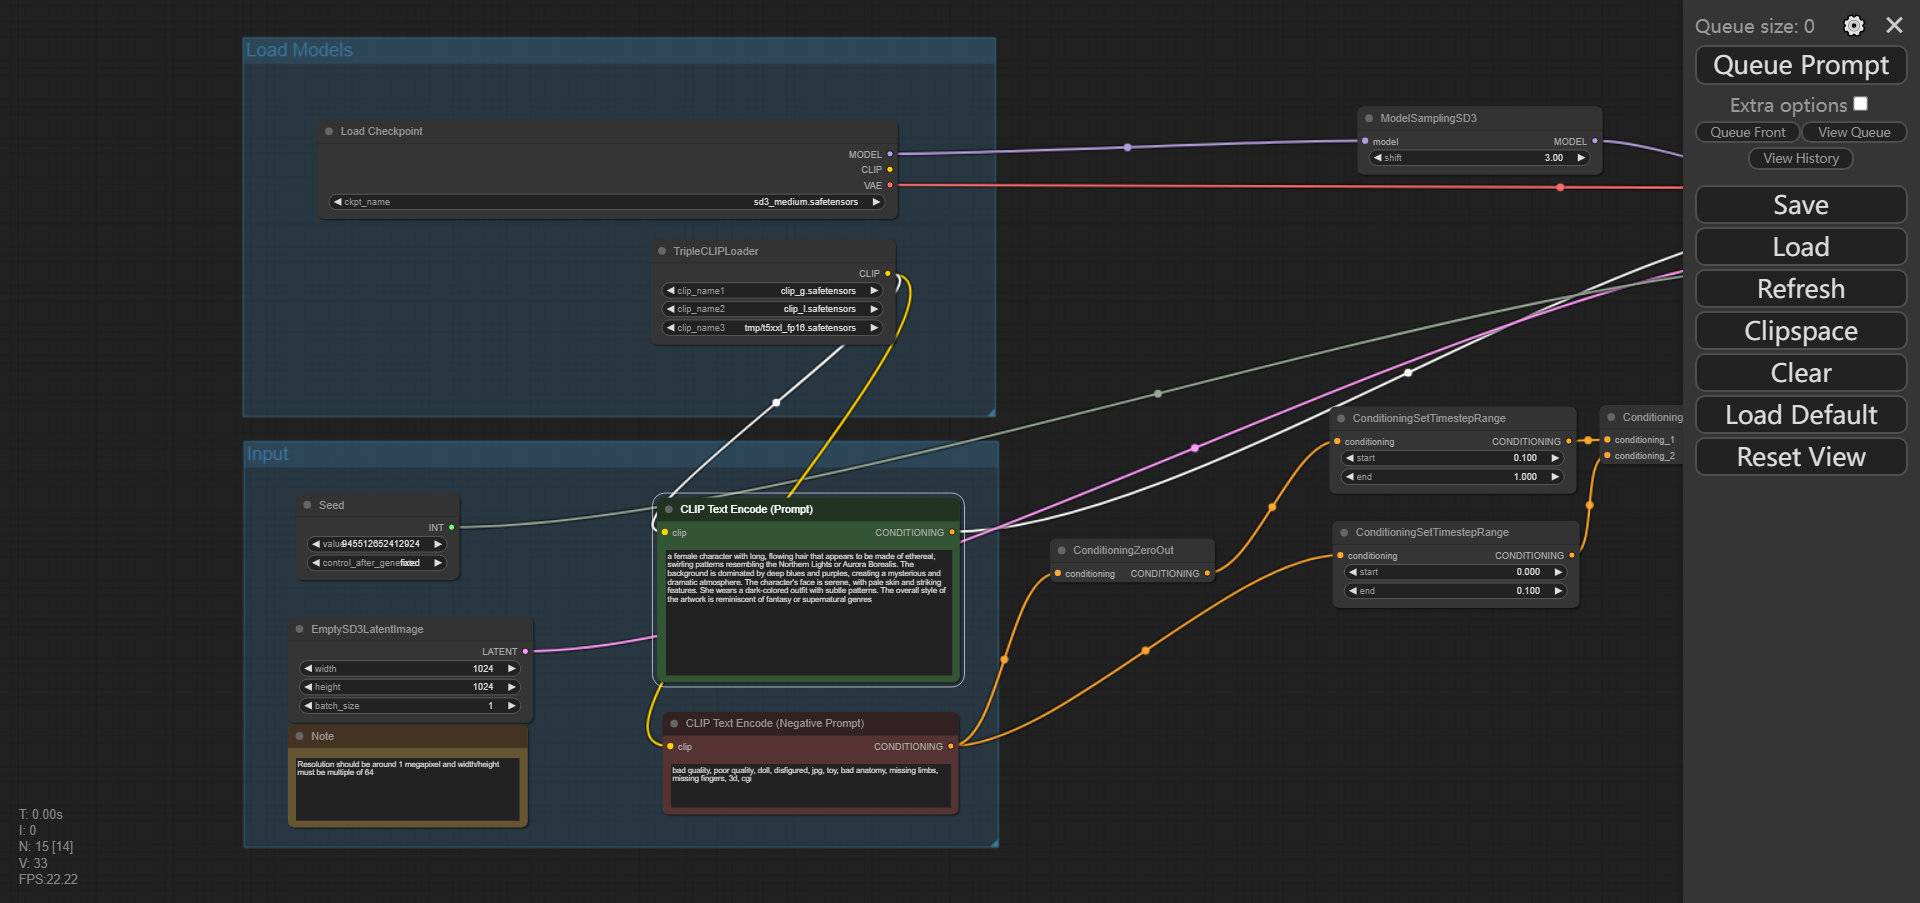
下载ComfyUI的SD3的工作流:
进入huggingface的comfy_example_workflows文件夹,下载里面的文件,可以都下载进来,比如下载sd3_medium_example_workflow_basic.json文件,这个文件就放在你自己的笔记本里面备用。
运行
1 | python main.py --listen 0.0.0.0 --port 10000 |
加载成功后命令行显示:
1 | Total VRAM 24268 MB, total RAM 257596 MB |
在你的浏览器中输入:http://服务器的IP地址:10000来访问,这是界面:
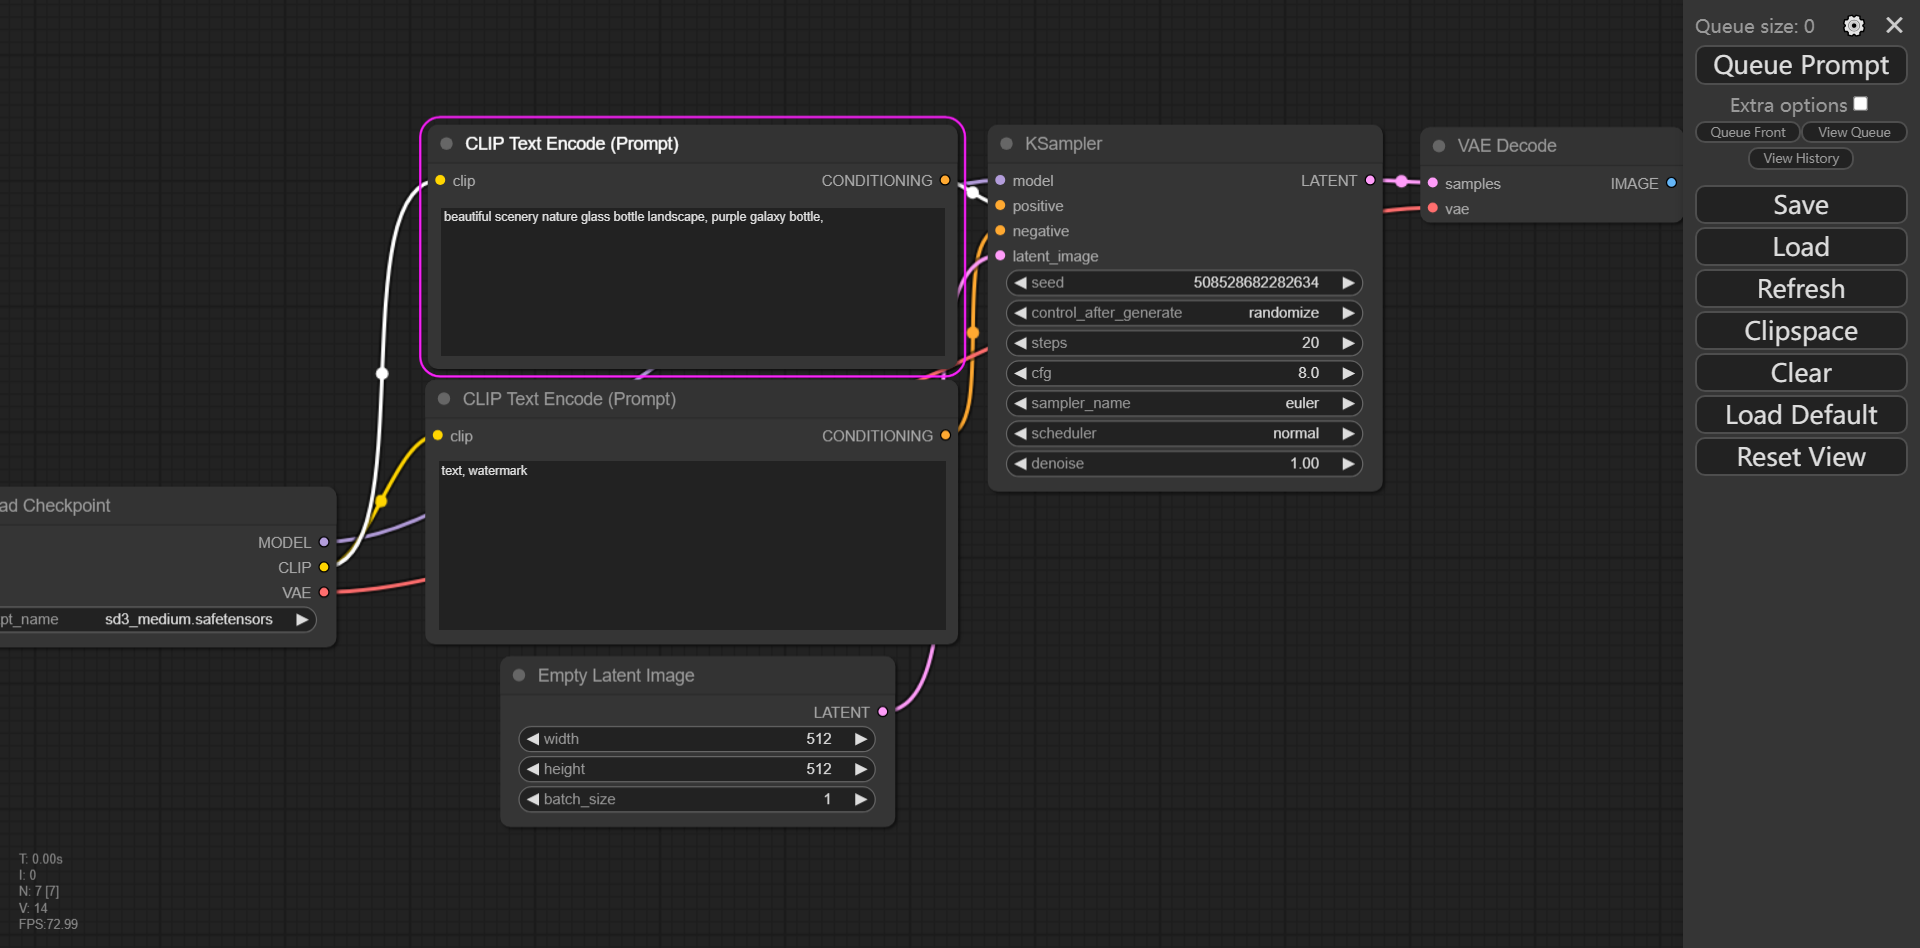
这与之前的WebUI完全不啊,是一个流程图的形式,感觉很高级,WebUI的界面我其实更加喜欢,但是好像还没有兼容Stable diffusion3,等后续更新吧。
这里是ComfyUI默认的工作流,不适合最新的Stable diffusion3。需要调整为Stable diffusion3的流程:将之前下载的sd3_medium_example_workflow_basic.json直接拖到界面里,流程就变了,之后你需要再次点击Load CheckPoints、TripleCLIPLoader里面的选项选择刚才下载的那些文件。
这个时候点击右侧的Queue Prompt就可以生成了(第一次生成的时候需要先加载模型会慢一些,后续再生成就快了)。
生成测试
这是我生成的结果:
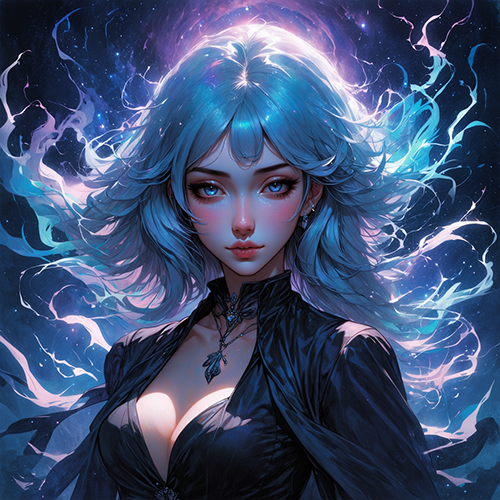
因为种子被固定了,默认生成图片都是一样的。
我又试了一下之前的提示词的结果,效果好一些:

1 | A cyberpunk-inspired Chinese goddess with long, flowing locks, her hair interwoven with glowing strands of silk, standing atop a skyscraper overlooking a neon-drenched cityscape. |
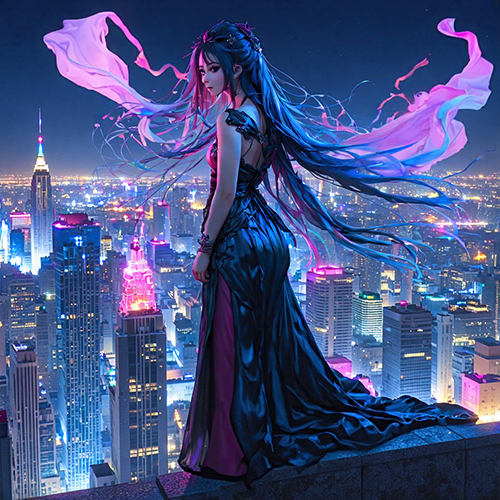
好像特别会画赛博朋克风格的图片,这些风格的图片路边招牌好像都是日文。
1 | A couple sharing a tender farewell kiss near a black hole, depicted in the ethereal style of Chinese ink wash painting, with the cosmic backdrop blending into a gradient of ink tones |
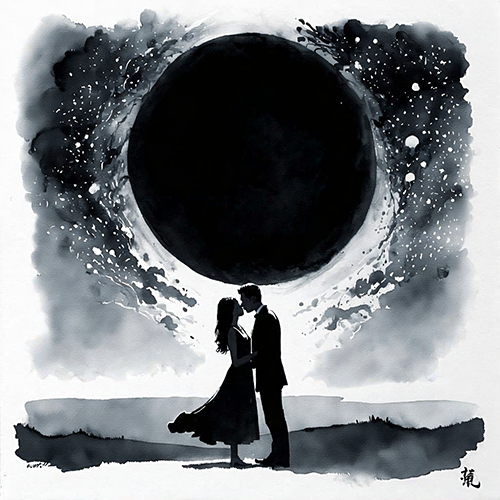
也许训练的图片中国画都有印章,我生成了几张竟然还像模像样的都有印章。
1 | A molecular diagram of DNA replication, highlighting the intricate dance of base pairing and the replication machinery at work |
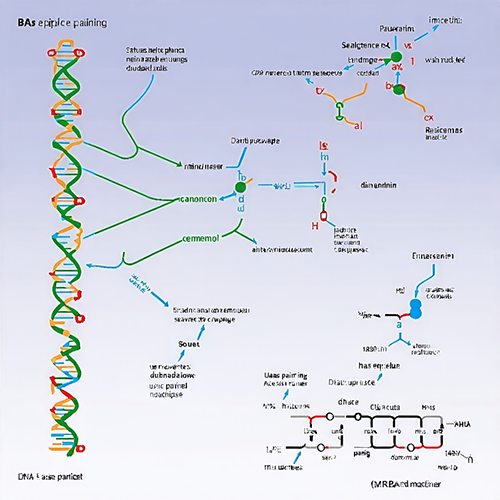
学术图片画的还有模有样的,像是拿一张图PS的。
1 | Lin Daiyu, the delicate yet resolute heroine from the classic Chinese novel, in a moment of bold action, forcefully pulling out the trunk of a willow tree, symbolizing her inner bravery |
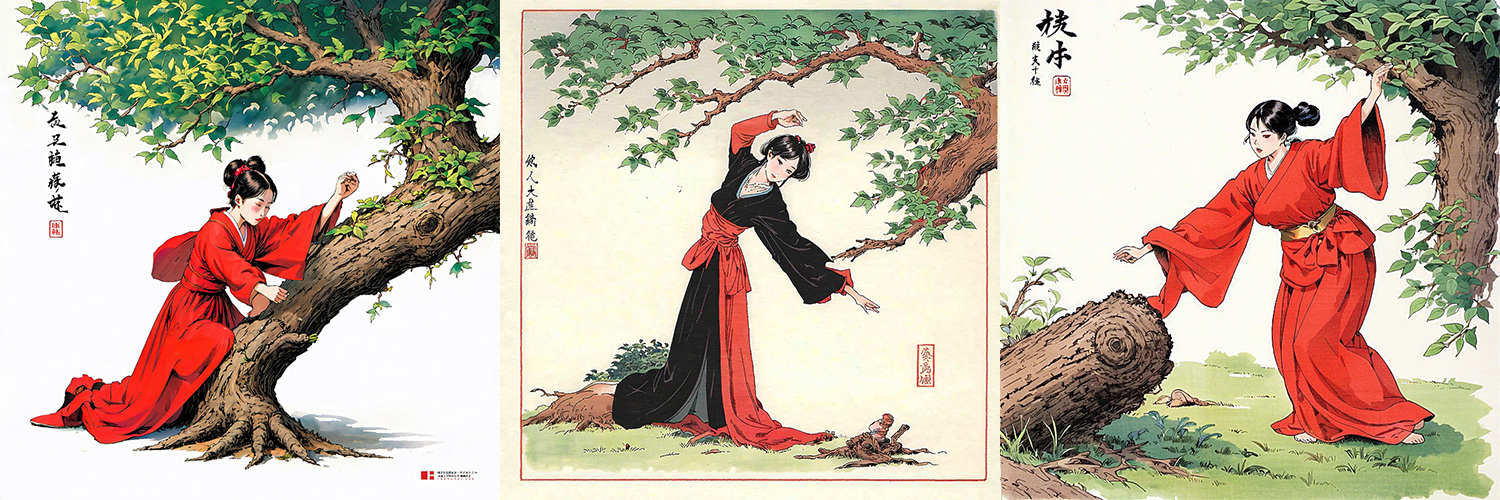
想画个林黛玉倒拔垂杨柳,想象力还是不够,画了很多张都没有拔的,倒是直接给杨柳的腰拉下来了!
1 | A youthful and vibrant Chinese girl in her late teens, with clear skin, bright eyes, and a fashionable sense of style, embodying the spirit of modern Chinese youth |
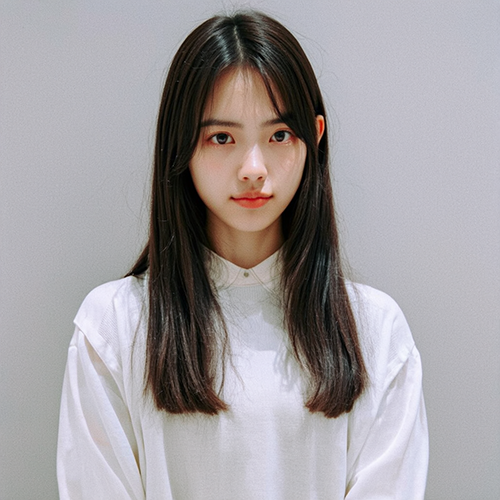
美女必须要画!
在执行过程中,显存高峰大概占用18G。不知道为啥,生成了一两张图片之后再点击生成就没反应了,感觉像BUG。我又试了一下,需要变更参数,比如种子才会再次生成图片。
 微信打赏
微信打赏