参考腾讯云GPU服务器部署Ai绘画Stable Diffusion 小白可用

介绍

Stable Diffusion是2022年发布的支持由文本生成图像的 AI 绘画工具,是一个开源的工具,其他的比如Midjourney、文心一格目前闭源。

现在Stable Diffusion的图形化界面主要用的是越南人AUTOMATIC1111的项目stable-diffusion-webui,里面的代码是尽可能方便的构建环境和下载模型文件,但是对于国内的来说就反而变得不方便了,封装的有点过头。我尝试运行bash webui.sh文件或者github仓库硬是下载不了,而且目前大部分的教程都是在教怎么一键运行,包括更改连接之类的,我这儿试了总是有一些文件下载不了,于是决定拆解代码自己取下载和拉取仓库,按照下面的步骤执行就可以知道哪些地方缺东西了:

构建环境

构建conda环境

1
2
conda create -n SD python=3.10
conda activate SD

下载WebUI

下载常用的WebUI

1
2
3
4
5
# 这里使用镜像
# 如果不行就去https://github.com/AUTOMATIC1111/stable-diffusion-webui下载zip文件
git clone https://github.moeyy.xyz/https://github.com/AUTOMATIC1111/stable-diffusion-webui.git

cd stable-diffusion-webui

调整代码,打开launch.py,将下面的代码注释掉(这段代码是建立虚拟环境,安装相应的包):

1
2
3
# with launch_utils.startup_timer.subcategory("prepare environment"):
# if not args.skip_prepare_environment:
# prepare_environment()

拉取github:

1
2
3
4
5
6
7
8
9
# 进入到repositories文件夹
cd repositories

# 下载不了就去github下载zip,然后放在repositories文件夹下再改名
git clone https://github.com/AUTOMATIC1111/stable-diffusion-webui-assets.git stable-diffusion-webui-assets
git clone https://github.com/Stability-AI/stablediffusion.git stable-diffusion-stability-ai
git clone https://github.com/Stability-AI/generative-models.git generative-models
git clone https://github.com/crowsonkb/k-diffusion.git k-diffusion
git clone https://github.com/salesforce/BLIP.git BLIP

安装包:

1
2
3
4
5
6
7
8
9
10
11
12
13
14
15
# 回到文件夹
cd ../stable-diffusion-webui

# 安装依赖包
pip install -i https://pypi.tuna.tsinghua.edu.cn/simple -r requirements.txt

# 安装torch2.3.0为了契合xformers
# WebUI中安装的是2.1.2版本,这里用新版我运行没问题
pip install torch==2.3.0 torchvision==0.18.0 torchaudio==2.3.0 --index-url https://download.pytorch.org/whl/cu118
# pip install -U -I --no-deps xformers==0.0.23.post1
pip install -i https://pypi.tuna.tsinghua.edu.cn/simple ngrok
pip install -i https://pypi.tuna.tsinghua.edu.cn/simple pytorch-lightning==1.6.5
pip install -U xformers --index-url https://download.pytorch.org/whl/cu118
pip install -i https://pypi.tuna.tsinghua.edu.cn/simple dctorch timm
pip install -i https://pypi.tuna.tsinghua.edu.cn/simple fastapi==0.90.1

下载模型

下载用来生成图片的模型,现在模型有很多,这里先测试能不能用,就先下载这些模型,每一个模型大概有4G的占用。

1
2
3
4
5
6
7
8
# =================== 下载用来生成图片的模型 ===========
# 下载v1-5-pruned-emaonly.safetensors
# https://huggingface.co/runwayml/stable-diffusion-v1-5/resolve/main/v1-5-pruned-emaonly.safetensors
mkdir -p models/Stable-diffusion/
mv v1-5-pruned-emaonly.safetensors models/Stable-diffusion/
# 下载sd-v1-4.ckpt(可选)
# https://huggingface.co/CompVis/stable-diffusion-v-1-4-original/blob/main/sd-v1-4.ckpt
mv sd-v1-4.ckpt models/Stable-diffusion/

其他模型,这些模型可以在civitai找到:

  1. chilloutmix:网上看到比较火的模型,包含有18+的内容!
  2. Korean-doll:可以绘制韩风美女。
  3. Lora:现在好像找不到了,包含有18+的内容!
  4. WAI-REAL_CN:中国风美女!

下载了之后把模型文件放在models/Stable-diffusion下面,就可以选择这个模型了。

下载clip模型,这个给图片和提示词建立关联用的东西:

1
2
3
# 进入https://huggingface.co/openai/clip-vit-large-patch14/tree/main
# 把所有的文件下载下来,放到下面这个文件夹里面
mkdir -p openai/clip-vit-large-patch14

脸部优化:

1
2
# https://github.com/TencentARC/GFPGAN/releases/download/v1.3.0/GFPGANv1.4.pth
# 文件下载之后放在stable-diffusion-webui下面,也就是根目录

开始运行

1
2
3
4
5
6
# --listen  以0.0.0.0侦听
# --no-half 不要将模型切换到16位浮点数
# --xformers 使用xformers加速
# --port 10000 设置端口为 10000
# --skip-torch-cuda-test 退出torch cuda测试
python launch.py --listen --no-half --skip-torch-cuda-test --xformers --port 10000

运行成功后显示:

1
2
3
4
5
6
7
8
9
Loading weights [6ce0161689] from /home/xxx/stable-diffusion-webui/models/Stable-diffusion/v1-5-pruned-emaonly.safetensors
Running on local URL: http://0.0.0.0:10000

To create a public link, set `share=True` in `launch()`.
/home/xxx/stable-diffusion-webui/repositories/stable-diffusion-webui-assets
Startup time: 7.3s (import torch: 2.3s, import gradio: 0.6s, setup paths: 1.8s, initialize shared: 1.3s, other imports: 0.4s, load scripts: 0.3s, create ui: 0.4s, gradio launch: 0.1s).
Creating model from config: /home/xxx/stable-diffusion-webui/configs/v1-inference.yaml
Applying attention optimization: xformers... done.
Model loaded in 2.5s (load weights from disk: 0.5s, create model: 0.6s, apply weights to model: 0.6s, calculate empty prompt: 0.7s).

WebUI

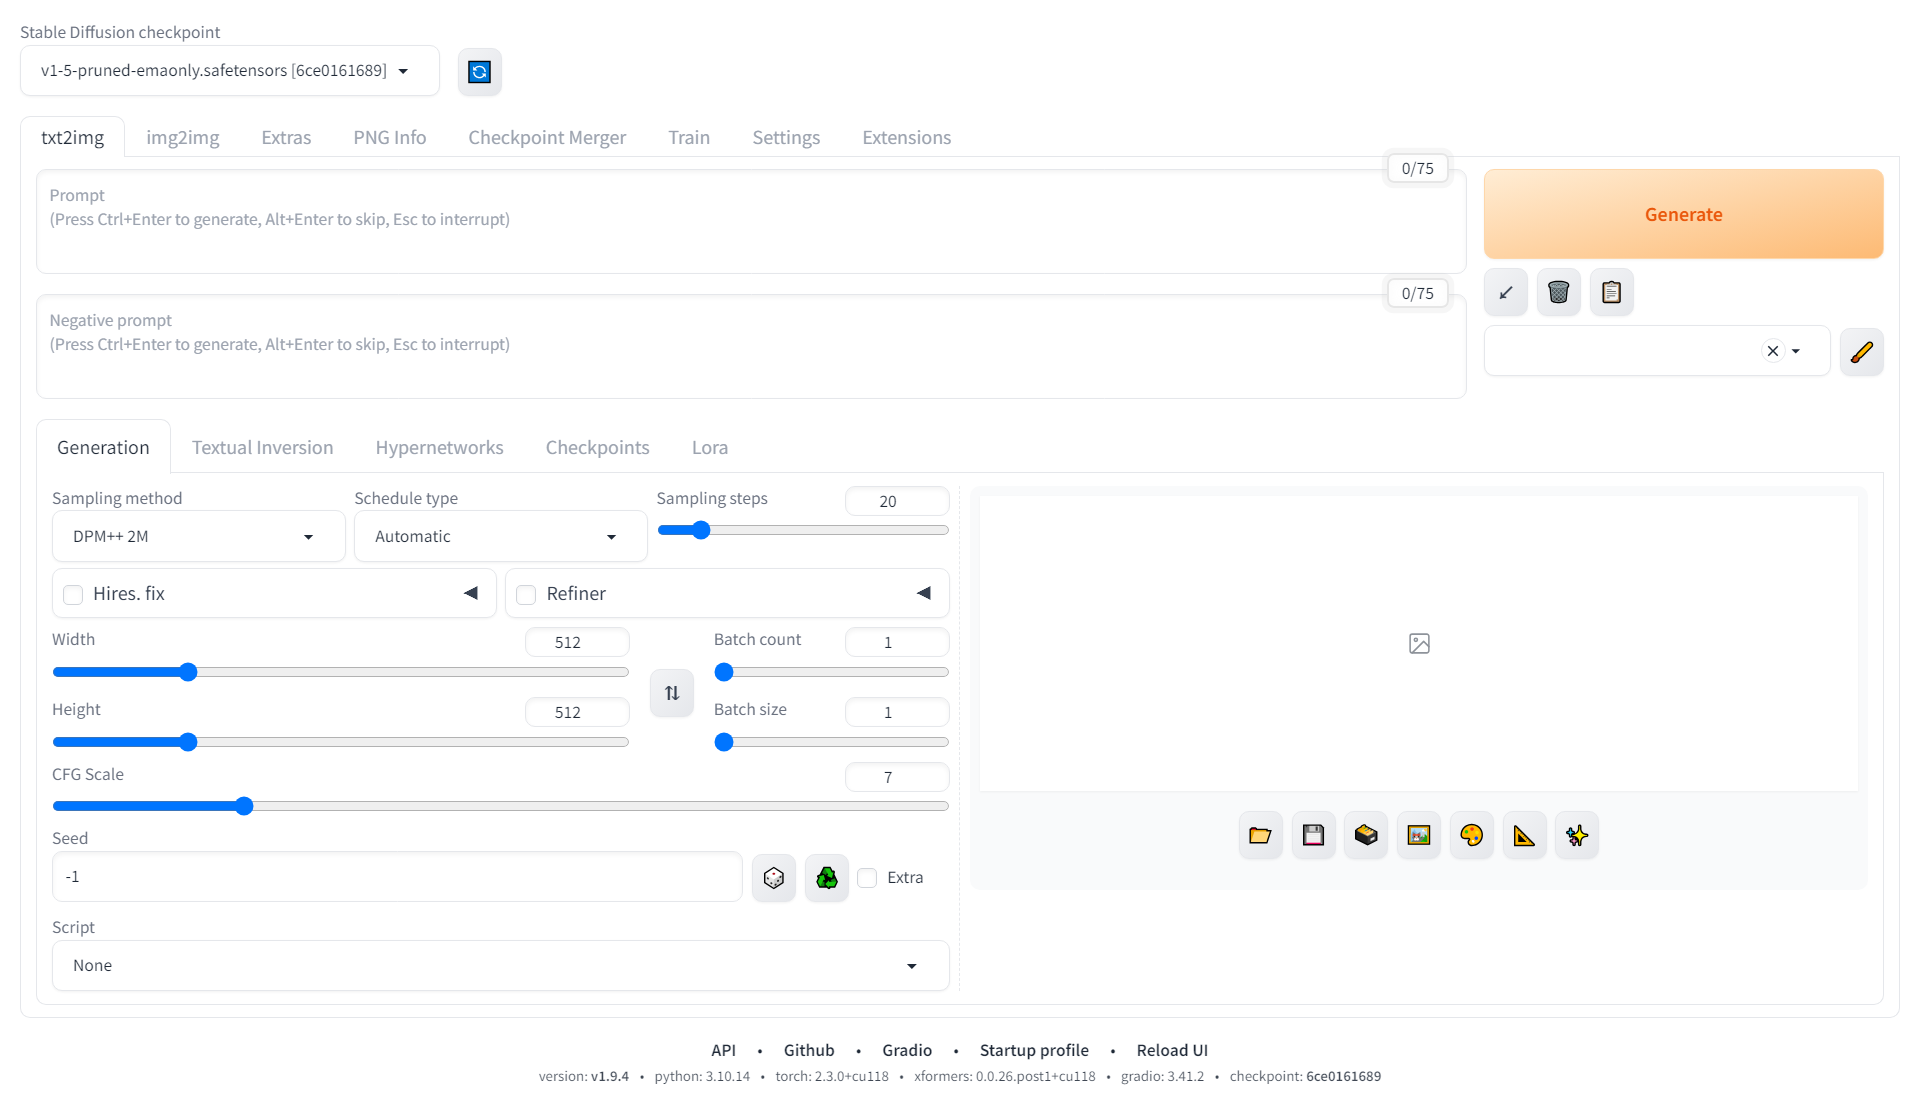
WebUI的界面,左上角可以选择模型,中间可以选择模式,右下角是模型参数,右侧是显示生成的图片。

如果运出现下面两种错误:

  1. AttributeError: __config__
  2. AttributeError: 'NoneType' object has no attribute '_id'

解决办法[Bug]: AttributeError: config

1
2
pip uninstall 
pip install -i https://pypi.tuna.tsinghua.edu.cn/simple fastapi==0.90.1

写的prompt:

1
A mouse floating in outer space, sitting on Tom's head and hugging a piece of cheese.

生成的图:

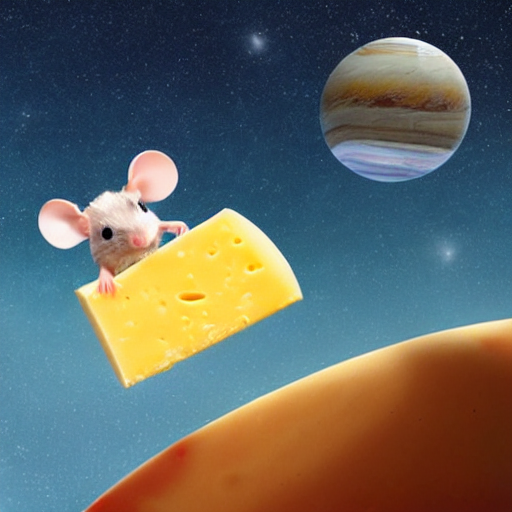
试了一下,原本下载的模型v1-5-pruned-emaonly.safetensors生成的结果惨不忍睹。prompt这么短都给我省略内容是吧!我的汤姆猫呢!

运行过程中,显存大概占用6G左右。3090完全够用!

ControlNet

controlNet的插件安装和使用后续再补充。